Building a Moving Espresso Machine in a Day: Drawing It Part by Part, and Simulating a Shot With Four Formulas
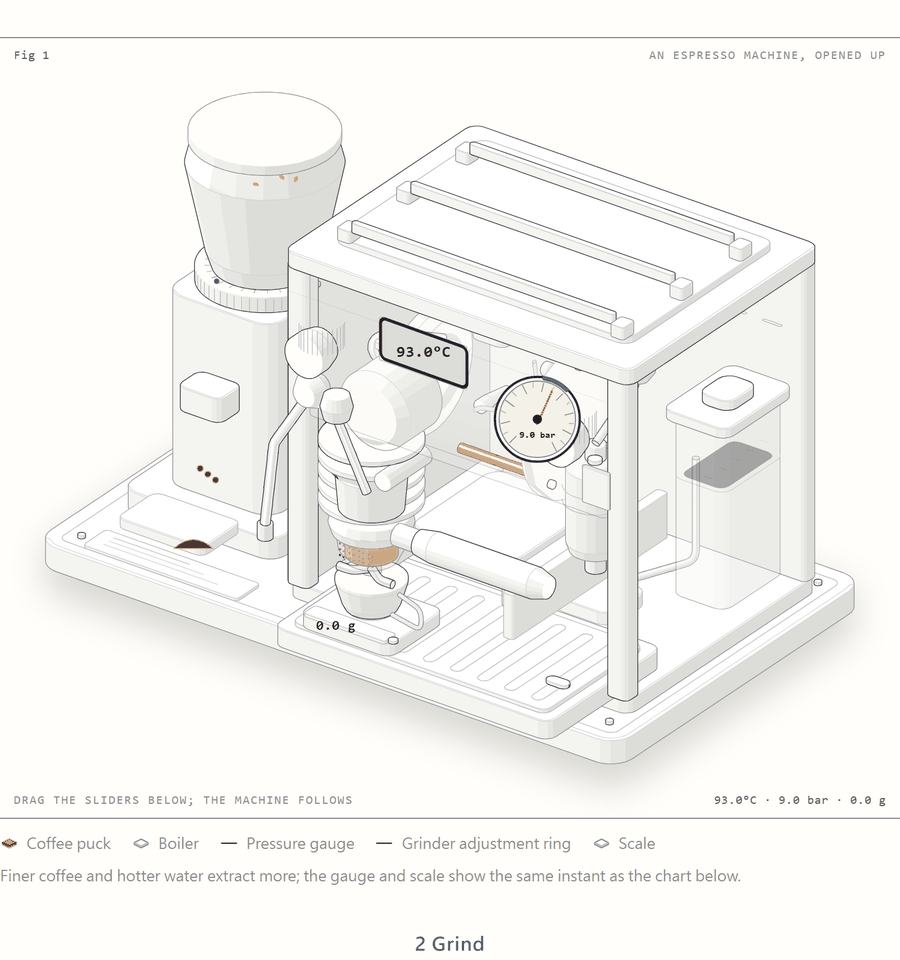
On October 14, 2026 I replaced the blog's espresso lab with a 110-part machine that moves with the sliders. Here is how it was drawn, how the code checks its own drawing for mistakes, and the four simplified formulas behind the extraction simulation, along with where they go wrong. A learning note, not advice.
Contents
- 11 a.m.: sliders first, machine later
- 1:30 p.m.: describing the machine in code
- After drawing, let the code find the mistakes
- Three ways to draw it, side by side
- 3 to 5:30 p.m.: making it move
- 5:47 p.m.: I clicked and nothing happened
- The simulation: four formulas
- The part people miss: more pressure isn’t more extraction
- ”I followed the settings. Why is it still off?”
- One thing to take with you
Essentially, all models are wrong, but some are useful.
—— George E. P. Box, Empirical Model-Building and Response Surfaces (1987)
On October 14, 2026, I spent a day turning the blog’s espresso lab from a few sliders and two line charts into an opened-up espresso machine where you can see the boiler and the plumbing: 110 solid parts and 11 pipes. Before it went live, code checked the drawing and found zero parts passing through each other, zero pipes left hanging, and zero parts floating in the air. The simulation underneath is just four simplified formulas. At the standard setting (18 g of coffee, 93°C, 9 bar) it takes 28.7 seconds to reach 36 g in the cup, at 20.2% extraction. That makes it useful for knowing which knob to turn. It won’t tell you what your own machine will pour next.
11 a.m.: sliders first, machine later
The first version was plain: three sliders (grind size, water temperature, pressure), an extraction curve, a flow curve, and a flat diagram on the side. The numbers moved but the picture didn’t, so it was hard to feel that “grind finer” and “water runs slower” are the same event.
What I wanted was for the grinder’s dial to turn when you drag the grind slider, and the gauge needle to swing when you change the pressure. That rules out a finished image. The figure had to know where each of its parts lives, so that one part can move on its own.
1:30 p.m.: describing the machine in code
So I wrote code that describes the machine part by part, all in one shared 3D coordinate space, and let the code do the drawing:
- the body, base and drip tray are boxes with rounded corners;
- the portafilter handle, the cup and the boiler are cylinders;
- knobs, the grinder lid and the cup’s foot start as a side profile that gets spun around an axis, the way a potter shapes a bowl on a wheel;
- each water pipe is a list of points with a tube swept along it.
Then one fixed viewing angle flattens the 3D coordinates onto the page: turned 54 degrees and tilted down 29. People often call this kind of picture isometric, but true isometric needs the three axes 120 degrees apart, and this angle isn’t that. “Axonometric projection” is the more accurate name. I thought about letting readers rotate the machine and decided against it. Every new angle means recomputing what hides behind what and where each label sits, and the payoff felt small.
The drawing and checking toolkit is an open-source package (wheresryan22/anatomy, MIT license), and I wrote the code with an AI coding assistant. Drawing turned out to be the quick part. The checking took longer.
After drawing, let the code find the mistakes
Eyes are easy to fool. When two pipes cross on screen, you can’t tell whether one passes in front of the boiler or straight through it. So every redraw ends with an audit that checks:
- whether any parts pass through each other;
- whether both ends of every pipe land on a part instead of hanging in the air;
- whether any part is floating with nothing holding it up;
- whether front-to-back stacking is right (this machine has 837 such ordering rules);
- whether any part’s outline crosses itself on screen.
The version that shipped has 110 solids and 1,064 paths, every check came back zero, and one audit run takes 7.8 seconds. If you take one technique from this post, take this one. Whether a figure looks good needs a human; whether it is correct can be handed to code.
Three ways to draw it, side by side
| Approach | Changing one part | Can parts move on their own? | Does it catch its own mistakes? |
|---|---|---|---|
| Ask an AI to generate an image | Regenerate the whole thing; details drift every time | No, it’s a flat picture | No; a misrouted pipe looks fine |
| Hand-draw an SVG | Editable, but you manage front/back order yourself | Yes, but every motion is hand-tuned | No, it’s all eyeballing |
| Describe parts in code, then project | Change one number; stacking re-sorts itself | Yes, parts are separate from the start | Yes, the audit runs on every redraw |
The third way is the slowest to start, because you have to settle each part’s size and position up front. It starts paying off the second time you need to change something.
3 to 5:30 p.m.: making it move
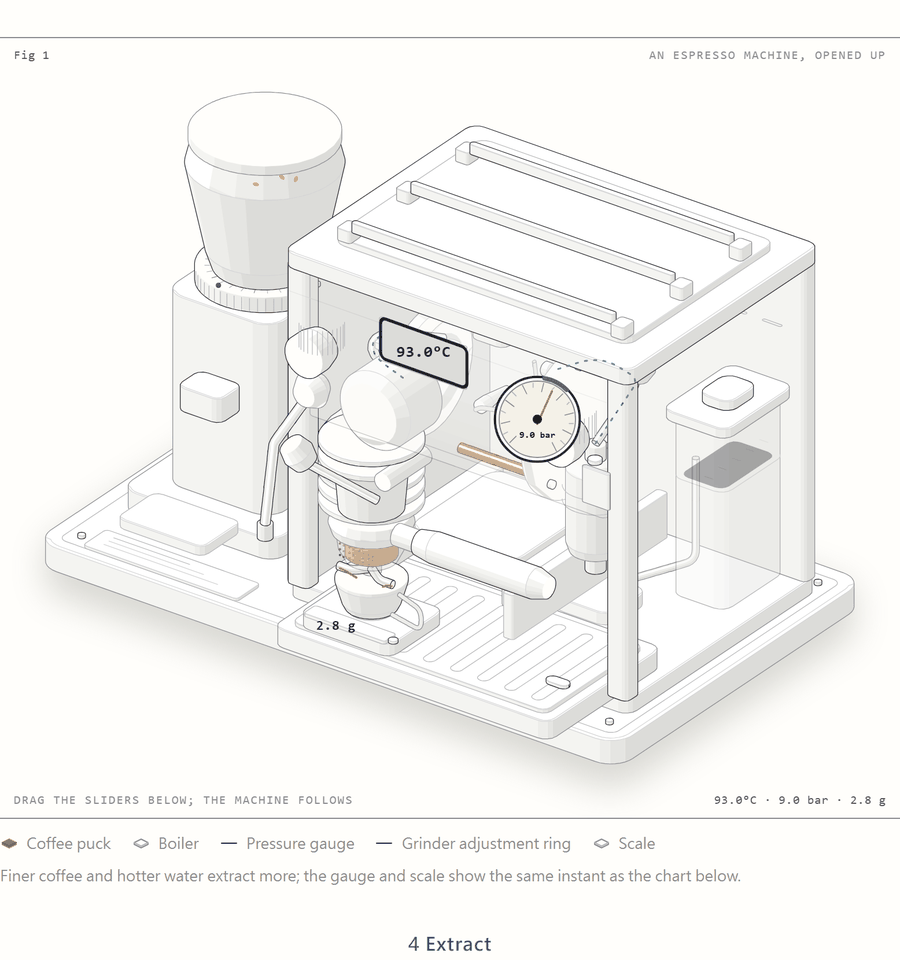
Once the parts are separate, animation means changing one part’s position or angle. Drag the grind slider and the dial turns. Change the temperature and the readout by the boiler follows. Press brew and the group lever swings down 40 degrees, two streams run from the portafilter into the cup, and the scale climbs to 36 g. Grind too fine with the pressure too high, and cracks appear across the puck. That’s channeling, which I explain further down.
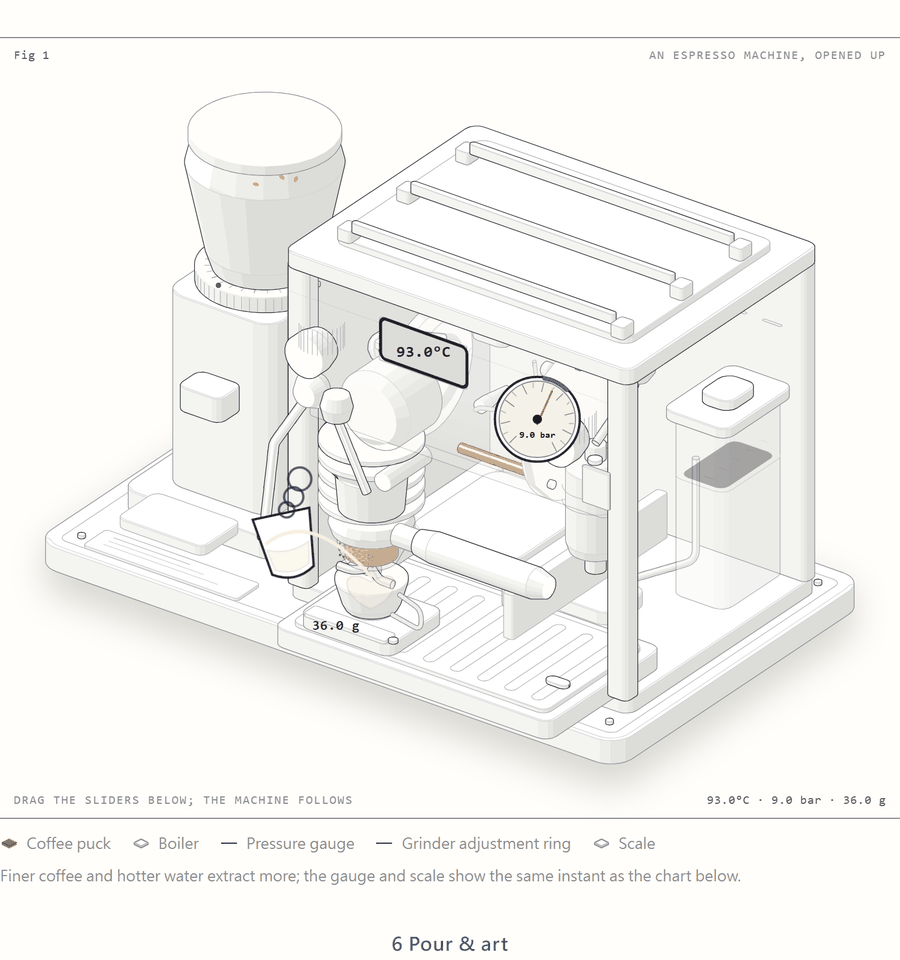
In the evening I filled in the whole drink: beans, grind, dose, extract, steam, pour, done. That’s seven steps, and clicking the machine replays them. I’ll be honest about the weak spot. The milk pitcher in the last two steps is still a flat line drawing. You can see the pour happen, but it doesn’t look solid.
5:47 p.m.: I clicked and nothing happened
Once it was live, I clicked the machine and it sat there. The code was fine. My browser was still running a copy from four hours earlier: the script’s address hadn’t changed, so the browser assumed the content hadn’t either and served the cached file. The fix was to add a content version to the script’s address, so any change produces a new address and forces a fresh download.
I’m keeping this one: sometimes the thing you think is broken was never actually swapped in.
The simulation: four formulas
The machine is the shell. What actually answers “will this shot be sour or bitter” is the model underneath, and it comes down to four formulas:
- Flow goes with the square of grind size, and with pressure. This comes from the physics of water moving through a bed of particles. In theory, finer particles leave smaller gaps, and resistance scales roughly with particle size squared. A real puck has fines that clog and it compresses under load, so treat this as a rough relationship.
- Extraction climbs over time, slower and slower, topping out at 28%. Early water meets the easy-to-dissolve compounds; what’s left later dissolves slowly. A finer grind and hotter water make the climb faster.
- Channeling. With a very fine grind and pressure above 8.5 bar, water may open a crack in the puck and rush through it. Coffee next to the crack over-extracts while the rest under-extracts, so the cup is sour and bitter at once. The model scores this risk from 0 to 1.
- Taste. Sweetness peaks around 20% extraction. Below that the cup leans sour, above it bitter, and channeling pushes both up together.
The extraction math is the usual one: extraction = strength (TDS) × beverage weight ÷ dose. At 18 g in, 36 g out and 20.2% extraction, strength is about 10.1%.
Here are the lab’s four presets run through the model:
| Preset | Grind / temp / pressure | Time to 36 g | Extraction | What happens |
|---|---|---|---|---|
| Sour | 380 µm / 89°C / 9 bar | 21.1 s | 13.0% | Too fast, under-extracted |
| Balanced | 300 µm / 93°C / 9 bar | 28.7 s | 20.2% | In the sweet spot |
| Bitter | 210 µm / 95.5°C / 10.5 bar | 45.4 s | 25.3% | Over-extracted, channeling risk 0.40 |
| Turbo | 420 µm / 93°C / 6 bar | 24.0 s | 15.0% | Leans sour |
The 18–22% extraction range you see everywhere is a coffee-world convention, not a standard any organization wrote for espresso. The famous “Golden Cup” chart from the Specialty Coffee Association was about filter coffee. Likewise, 18 g in, 36 g out in 25–30 seconds is a common starting point. The Italian Espresso National Institute’s certification spec is about 7 g of coffee, roughly 25 ml in the cup, 88°C and around 9 bar, which is a different ratio from the one most of us use.
The part people miss: more pressure isn’t more extraction
A common instinct is “turn the pressure up and you’ll get more out.” The model deliberately caps that. Above 9 bar, only 35% of the extra pressure turns into pushing water, because the puck packs tighter and absorbs most of it.
Run it: keep grind and temperature fixed and raise pressure from 9 to 11 bar. Flow goes from 1.45 to 1.56 grams per second, under 8% more. Extraction actually drops, from 20.2% to 19.7%, because the faster flow reaches 36 g in 27.3 seconds instead of 28.7. The water spends less time with the coffee and carries less out.
So when a shot runs sour, I reach for the grind first and leave pressure for last. With everything else fixed, going from 300 to 270 µm moves extraction from 20.2% to 22.6%, far more than the pressure bump did.
”I followed the settings. Why is it still off?”
This is what I most want to be clear about. The model is wrong in ways I can name:
- It doesn’t know your beans. Origin, roast level and age can give the same grind setting a completely different flow.
- It doesn’t know your grinder. I label grind in microns, but your grinder’s dial has no units, and “15” on two grinders can be far apart.
- It squeezes channeling into a single score. A real puck is uneven, and how you distribute and tamp matters.
So I use it like a compass. It gets the direction right: sour, grind finer; bitter, grind coarser; touch pressure last. How many clicks is still up to you: taste, write it down, adjust, repeat.
One thing to take with you
Once you’ve made something, write down how it could be wrong, then write a check that would catch that. My machine holds together because every redraw has code counting how many pipes are left unconnected; my own eyes miss plenty. Today, pick something you made, whether it’s a budget sheet, a trip plan or a bit of code. Write one concrete example of what it would look like if it were wrong, then actually check for it once and see whether you find it.
Comments
Loading comments…